Viewing entries in
chill out routine

Oh Hey Self-Care! This Simple DIY Lavender Sugar Scrub Recipe Will Melt Away Your Woes

Self-care is a wonderful way to honor your body and tap into your reserves of inner calm.

IMG_5859.JPG

A mindful time-out (such as the DIY lavender sugar scrub practice described below) nurtures your mind, body, and spirit, and offers a sense of renewal.

A homemade sugar scrub can transform your day by brightening your mood and relieving tension. This quick and easy-to-make DIY scrub is an excellent self-care practice to incorporate into your weekly routine.


Self-massage is a wonderful way to tune into your body and show yourself some love. And a homemade sugar scrub is perfect for just that.

This DIY lavender sugar scrub is a gentle exfoliator that can be used on your face and body. The calming scrub leaves your skin soft and smooth and the lavender scent will leave you feeling blissfully relaxed.

A simple practice like this proves that self-care does not need to be complicated, time-consuming, or expensive.

Check out the recipe and the full article on YogiApproved

Comment

Use These 4 Restorative Yoga Poses for Immediate Stress Relief

When we are at ease in body and mind, we feel open, expansive, and grounded. We are able to show up for ourselves, others, and our work fully, and we are our best selves.

However, when we experience stress, we tend to feel scattered, uncomfortable, and unsettled. The physical manifestation of stress might express as inconsistent and short breaths, tightness in the body, and tension in the face.

Stress is a mindset that we adopt (either consciously or unconsciously) in response to a given situation. More often than not, stress is an unsupportive addition to our daily lives.

Restorative Yoga is an antidote to the harm caused by stress, offering an opportunity to step back and reset the mind and body. A restorative practice offers a reprieve from stress that allows us to reframe our approach toward external stressors.

 
It can feel counterintuitive to take a time-out from our day when we feel pressed for time or burdened by an approaching event or deadline. Perhaps the very reason we feel stressed is because we feel short on time.

However, there can be value in taking a few minutes to change the channel in our minds and slow the pace of our inner dialogue. By taking the time to reassess, we might recognize the stress we carry to be unnecessary, and we can address the role of stress as an obstacle to our end goals.
 

Use These 4 Restorative Yoga Poses as Your Go-To Yoga for Stress Relief:

The Restorative Yoga poses below offer a holistic approach to stress relief. Restorative Yoga can imbue our lives with a fresh perspective, introspection, and a broader understanding of our response – a stark contrast to the narrow-minded thought pattern imprinted by stress.

Taking a moment to pause and break the cycle of tension can do wonders for your day, offering ease in the body, mind, and breath. The next time you need to recenter, give one or all of the poses below a try.
 
Props You Will Need: 4 blocks, 2 blankets, 1 bolster, optional eye pillow.
 
If you do not have the yoga props listed, please feel free to supplement with items found around your home. Firm pillows and/or a couch cushion can be a great substitute for the yoga props used in the poses listed below.

1. Restorative Twist

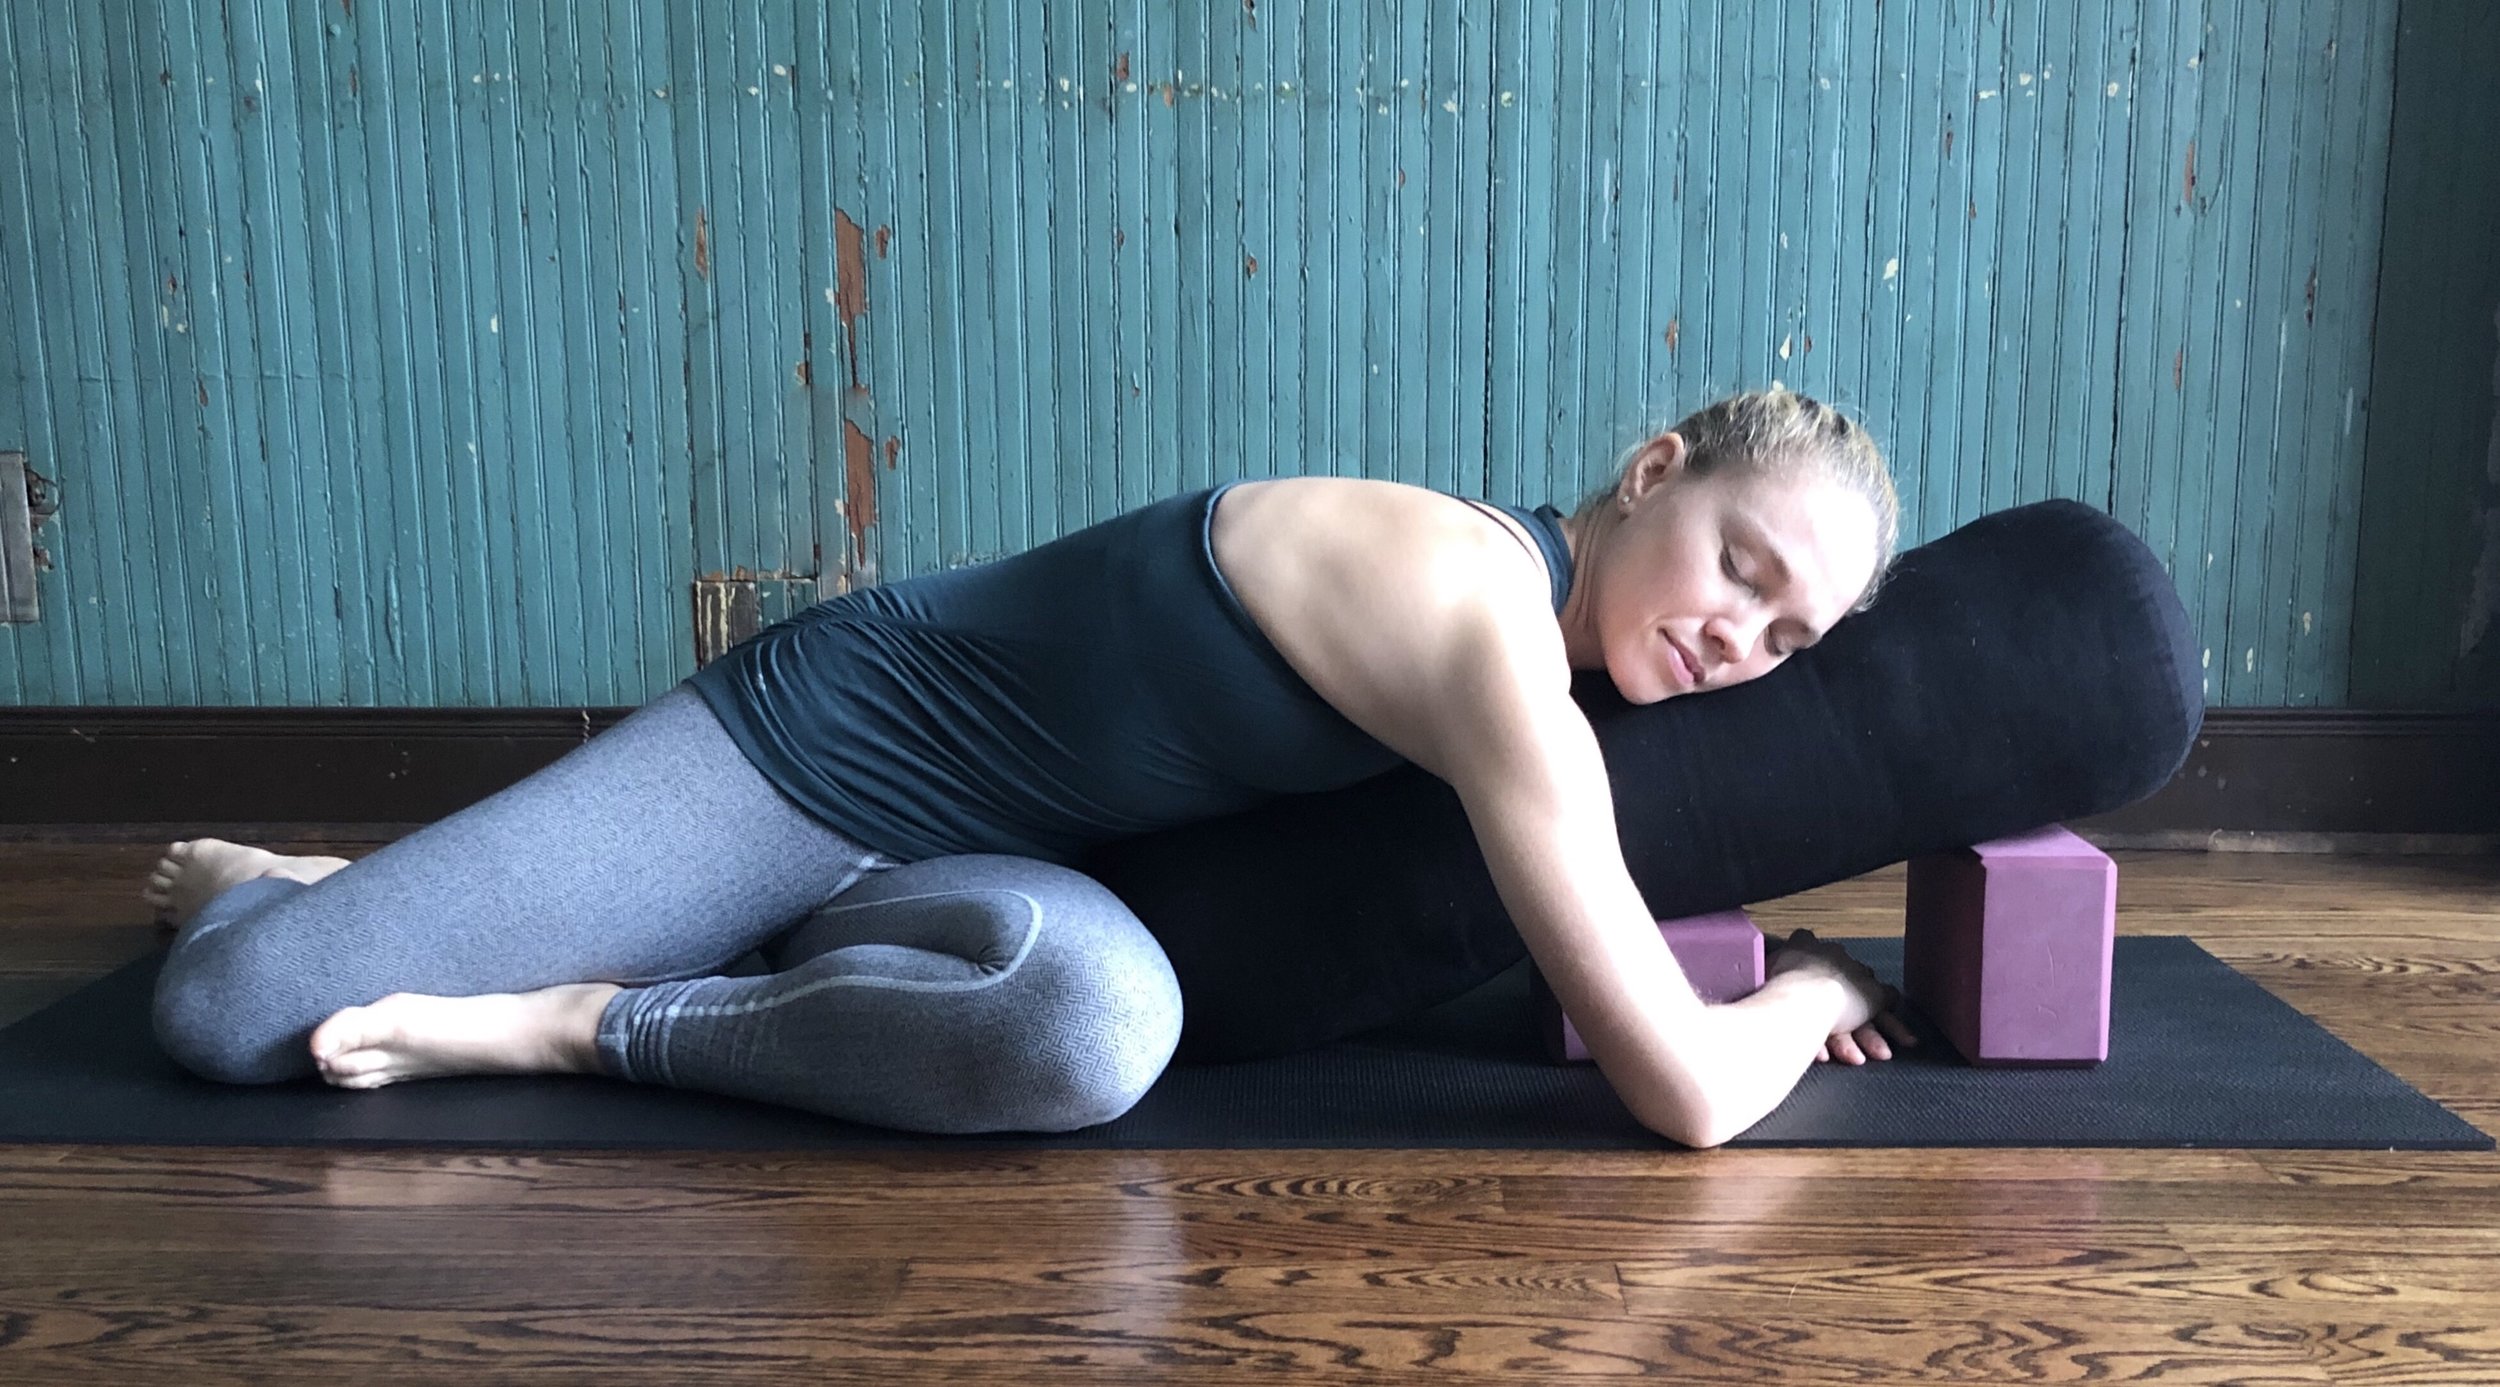
This Restorative Twist is a wonderful way to quiet the mind and gather grounding energy. Support under your belly offers a soothing effect, which alleviates feelings of worry and strain.

fullsizeoutput_22a0.jpeg

Let’s try it:

  • Place two blocks on your mat, the first block on its lowest height and the second block on the second height

  • Lay your bolster over the two blocks so you create a slope with the bottom edge of the bolster touching the floor

  • Snuggle your right hip at the base of the bolster with your knees bent to the left and your hands framing your props

  • Keep your navel as close to center as possible and lie down so the front of your body is supported by the bolster

  • Tuck your arms underneath the bolster and between the blocks

  • Your head can turn toward or away from your knees. Choose whichever option feels best for you neck

  • Enjoy each side for up to five minutes

Check out the other poses and the full article on YogiApproved

Comment

Comment

Feeling the heat? Keep it Cool with this Pranayama

F49CF039-9674-4396-9B71-D08CB53D8C64.JPEG

Sitali Pranayama is a breathing exercise, perfect for finding balance during summer. This cooling breath is a quick and easy to way to both beat the heat and calm the mind.

This pranayama is said to not only remove excess heat from the body, but it also keeps the mind and emotions cool, calm and in check during fiery Pitta season. 

Sitali Pranayama is practiced with a rolled tongue. If you are not able to roll your tongue, instead gently place the tip of your tongue to the top two teeth.

Let’s try it:

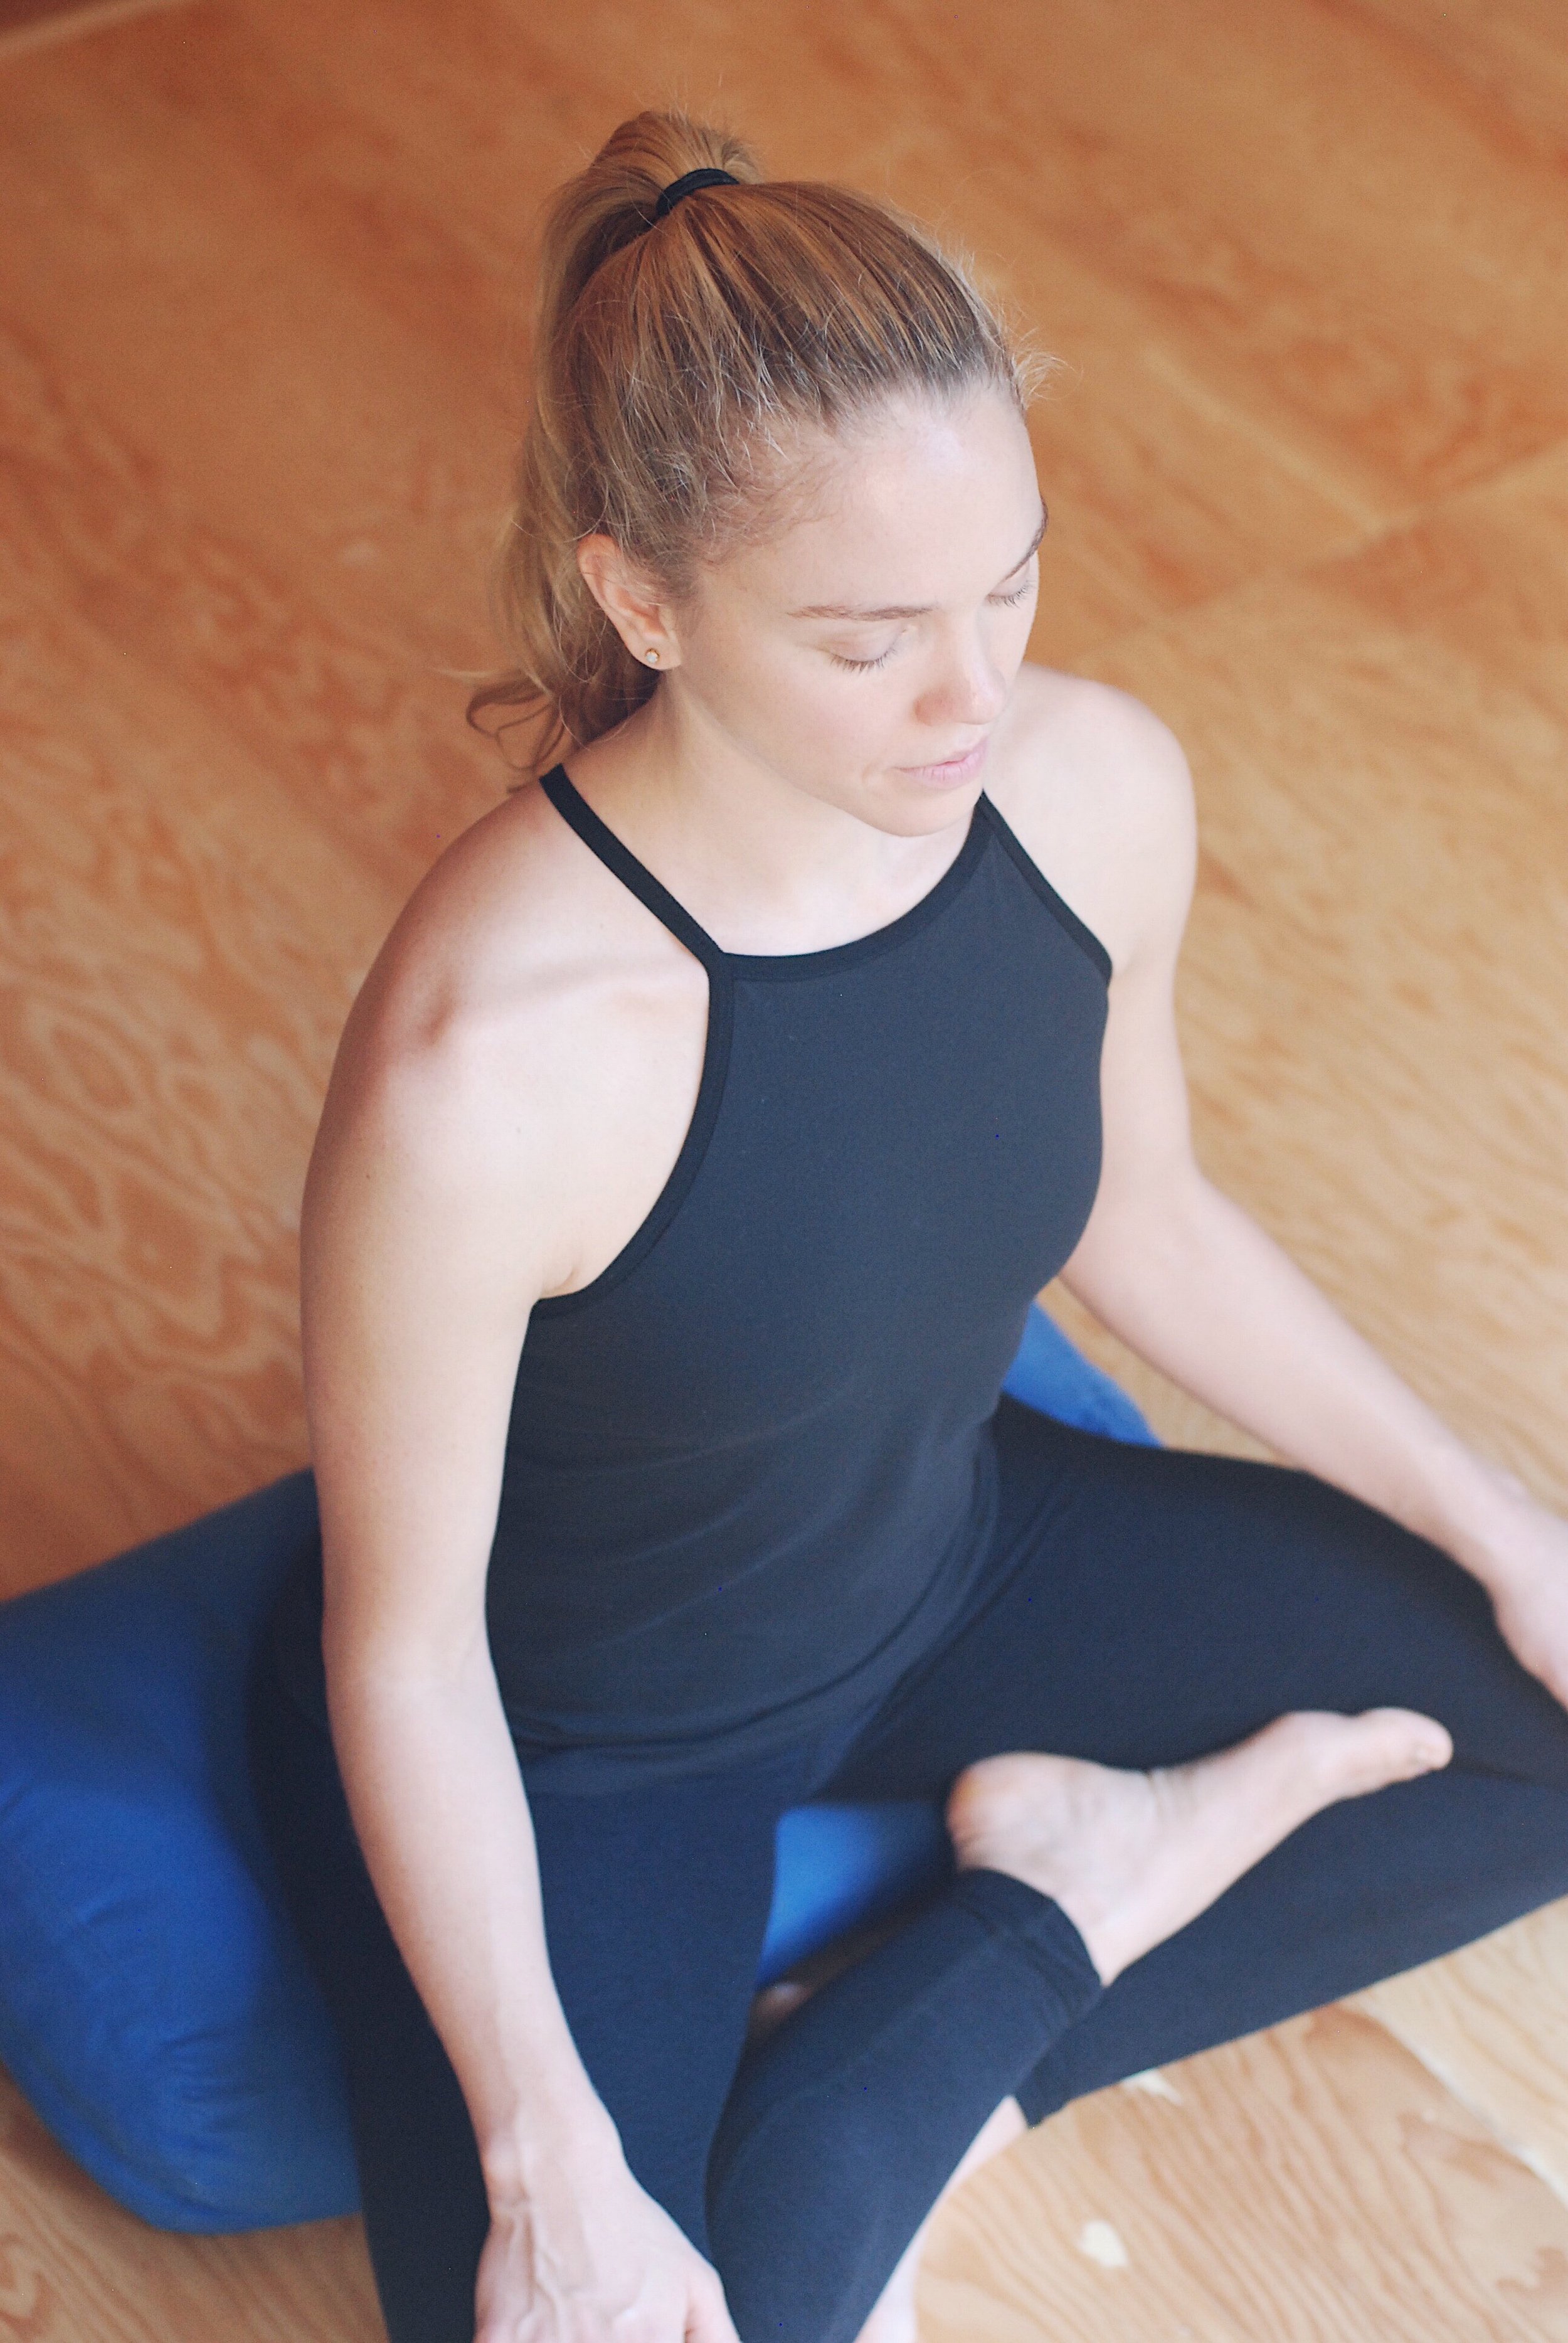
1. Find a comfortable seat. A great option is to sit cross legged on a pillow, blanket or bolster. Close your eyes and take a few deep breaths.

2. Start with a body scan, checking in from the top of the head and moving down the body. Notice how you are feeling physically, mentally, & emotionally. Take note of any areas which show signs of excess heat.

3. Once you feel ready to begin the breathing technique, roll your tongue. Breath in through the mouth with your tongue rolled. When you are ready to exhale, close the mouth and breath out through the nose.

4. Continue this for about 8-10 rounds, doing your best to keep the in and out breaths equal in length.

5. Allow the breath to resume a natural rhythm, breathing in and out through the nose. Take a few minutes to sit in meditation and take note of any cooling sensations.

*As with all pranayamas, if at any point you feel lightheaded, come back to a normal breath rhythm and continue again as you feel ready.

Sitali Pranayama is a wonderful way to stay balanced and cool all summer long. Give this breathing exercise a try the next time you need to keep your cool.

Comment

a restorative yoga sequence for some seriously sweet dreams

Comment

a restorative yoga sequence for some seriously sweet dreams

Who doesn't wish they could squeeze in a few more zzz's? Sleep is incredibly important for our wellbeing, proper immune function and lowering our stress levels. Although we might be aware of the health benefits of a good night’s sleep, sometimes it can be challenging to transition from the busyness of everyday life into a restful slumber. If you could use a bit of help winding down for bedtime, check out the restorative yoga sequence below. Taking 20 minutes before bed to slow down and unwind could be your ticket to snoozeville. 

For this practice you will need:

2 blocks or firm pillows, some wall space, a blanket (optional), and an eye pillow (also optional)

Short and sweet meditation

Begin in a crossed leg seated position, back facing the wall. You might want to sit on your block or blanket for additional support. You can also use the wall for back support if this is helpful. Close your eyes and draw your attention to your breath. Before you change your breath in any way, notice the natural rhythm of your breath. Take note of where the breath wants to live in the body and the quality of the breath. Be aware, there is no right answer to these questions. This is not about judgement but rather building awareness. Take this time to check in how you are feeling at the beginning of your practice.

After a minute or two gradually begin to deepen your breathing and begin:

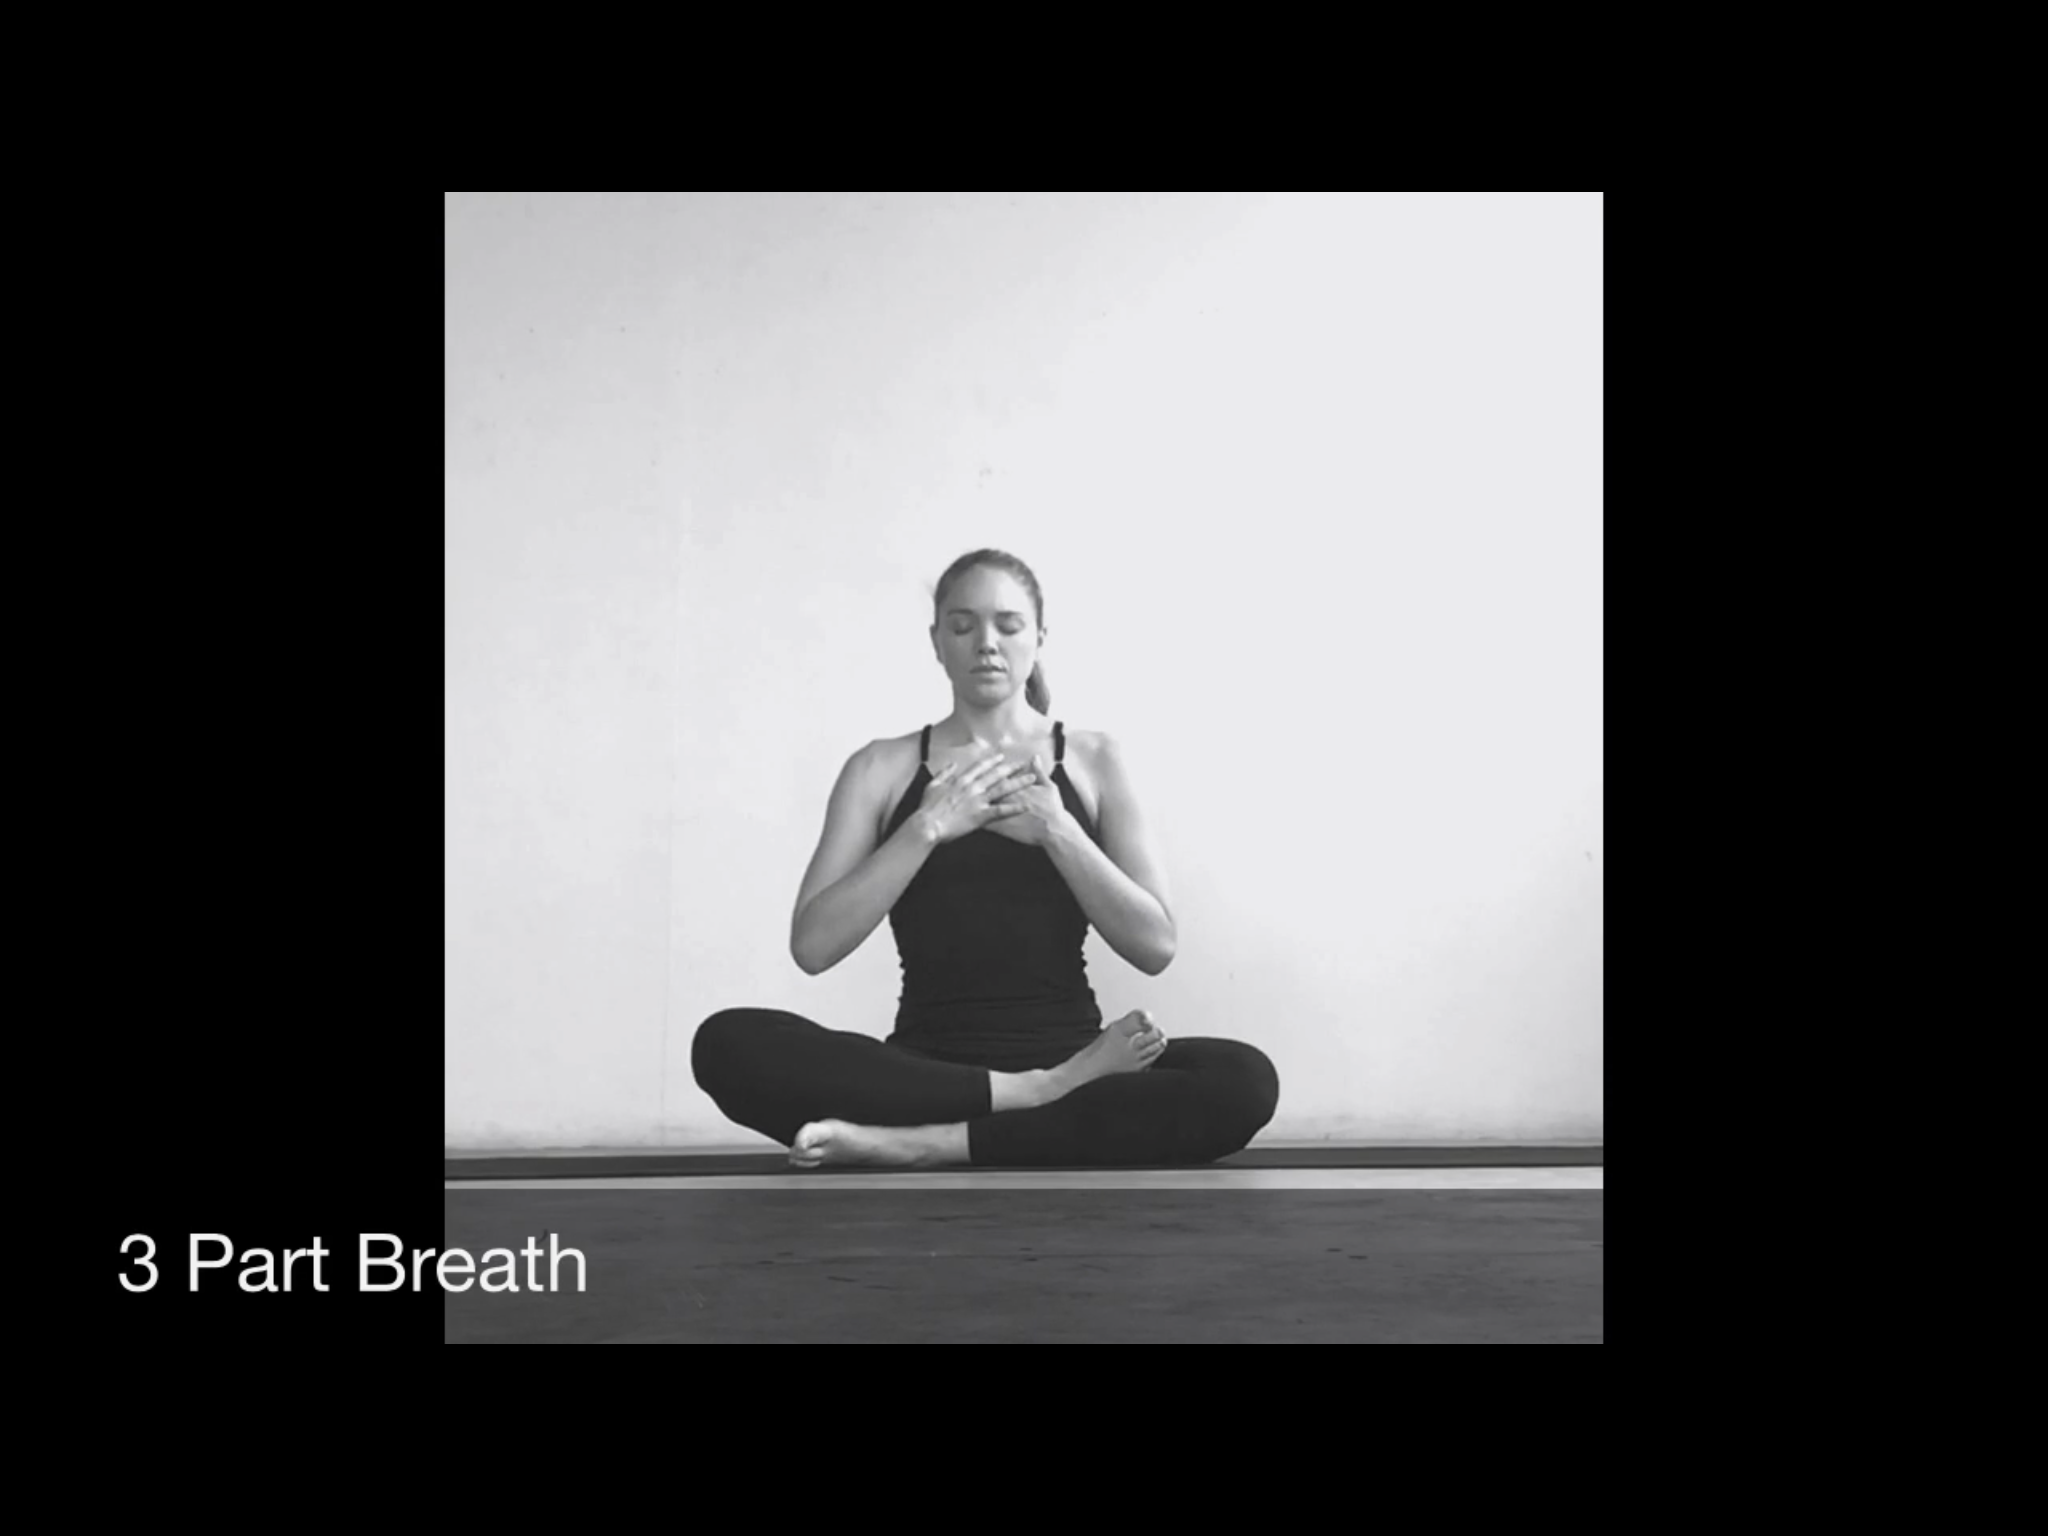
3-part breath (dirga swasam pranayama)

Divide the inhale into 3 equal parts, breathing into the belly, the ribs, and the chest. If it is helpful, you can use your hands to guide your inhale as you move the breath up the torso. Allow the breath to be continuous as you initiate your inhale from the low belly, lift the breath into the rib cage/diaphragm, and then the chest. Once you reach the top of your inhale, take a long, continuous exhale, following the same path in reverse. Repeat 5-10 rounds. You may slowly start to lengthen the breath as you feel ready.

*as with all pranayama (breathing exercises), stop if you become dizzy or lightheaded

 
fullsizeoutput_20c.jpeg

Legs up the Wall:

Snuggle one hip next to the wall, knees facing up toward the ceiling

Lay on your back as you simultaneously swing both legs up the wall. You can place your hands behind you to help this action.

Cover your eyes with an eye pillow. 

Take long deep breaths into the belly. Enjoy this pose for 5-10 minutes

*If the legs fall asleep, you can either come out of the pose or hug the knees into the chest for a few breaths and re-stretch the legs when you are ready.

*If the hamstrings are tight, the knees can stay a little bent in this pose. 

 
IMG_8337.JPG

Supine Twist

Bend the knees into the chest 

Rock the knees over to the left with your feet  gently pressing into the wall

Stretch your arms out on the floor, in line with your shoulders, chin turned towards your right shoulder

Optionally place your left hand on top of your right thigh to gently encourage the leg toward the floor, thus deepening your twist. 

Breath deeply, finding a smoothed out version of that same 3-part-breath with which we started practice. Hold 10 breaths, then switch sides


Supta Baddha Konasana

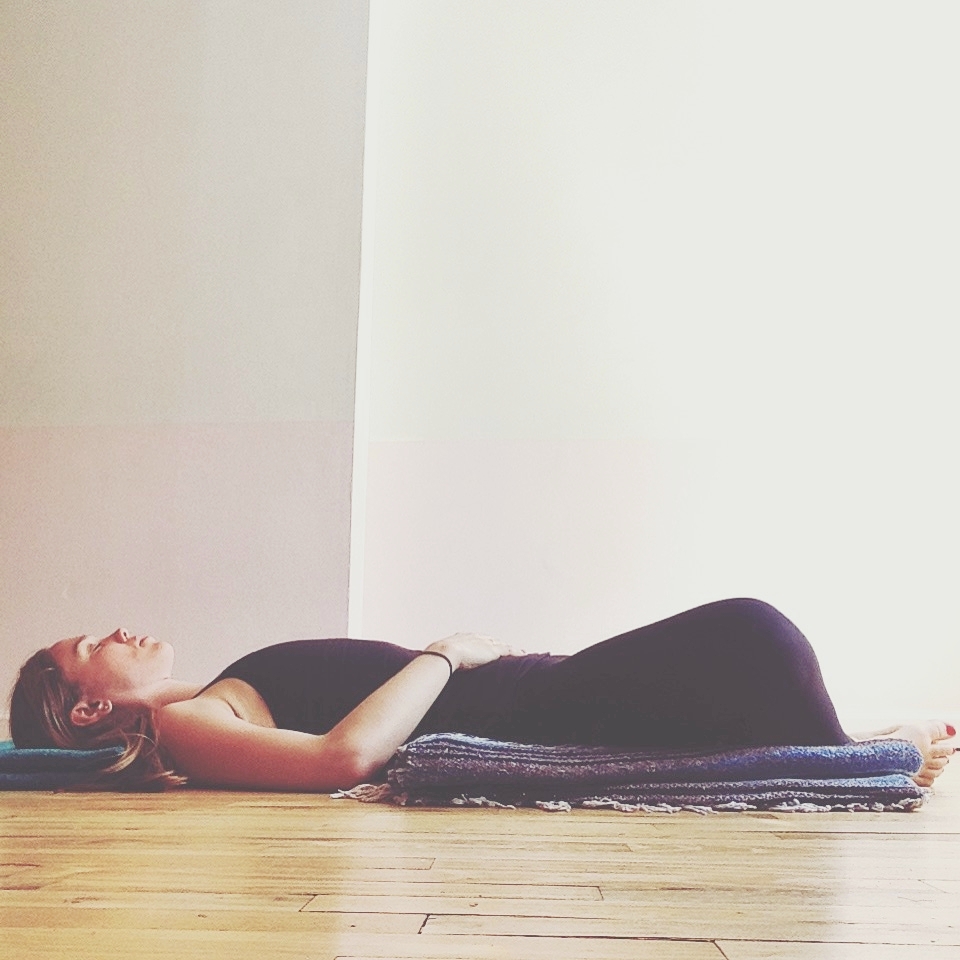
Lie on down on your back with an optional low folded blanket under your head. 

IMG_8717.JPG

Bring the soles of your feet to touch, open your knees to the sides, laying the thighs on either your blocks or firm pillows. 

Gently place an eye pillow over your eyes and a blanket over the belly. A blanket placed on the abdomen adds a sense of grounding, which is very helpful as you ease your way towards dreamland.

Enjoy this pose for 10 minutes. 

When you are ready to finish your practice, draw your knees together and rock side to side a few times. Roll to one side to press yourself up to sit.

Take a few breaths in a seated position, take note of how you feel. Then head to bed for some seriously sweet dreams!

Comment

Hipster Yoga: 20 minute hip opening yoga video

Comment

Hipster Yoga: 20 minute hip opening yoga video

Dear yogis,

I am off to Tulum this weekend for Brynne Billingsley and my Winter Escape retreat and I couldn’t be more excited! For those not joining us on the retreat this time around, I wanted to leave you with a new video so we can practice together while I am away :)

This 20 minute hip opening vinyasa flow is great for any time of day. Take a short break to stretch, breathe & re-center. Your body and mind will thank you for it!

Enjoy this feel good flow and let me know how it goes!

Adios!

xoJenny

Comment

legs up the wall: the cure-all yoga pose

Comment

legs up the wall: the cure-all yoga pose

Legs up the wall is sometimes know as the cure-all yoga pose. It boasts healing benefits for ailments ranging from anxiety to headaches to insomnia, making it a go-to yoga pose for just about anything.

I practice this pose almost every day as I find it to be a brilliant way to rest my legs after running around the city all day. It is also a wonderful way to find a bit of energy when you feel like you could use a boost.

Check out the video below for a rejuvenating, relaxing 5 minute restorative practice. This video includes a short and sweet meditation followed by legs up the wall with optional variations. You can practice this sequence any time of day, but it is especially helpful as an afternoon pick-me-up or an evening wind-down at the end of a busy day. I hope you enjoy this powerful healing pose as much as I do!

Comment

City Calm in 3,2,1 with 2-1 Breathing

City Calm in 3,2,1 with 2-1 Breathing

My yogi toolkit is a collection of short practices I count on to bring balance and calm to my day. These practices are a great way to supplement a yoga practice when I have a few minutes to spare.

One simple practice I carry in my yogi toolkit is 2-1 breathing, or Rechaka Pranayama. This simple breathing exercise doubles the length of the exhale, bringing stress relief to body and mind. It is the perfect antidote for anxiety, insomnia and stress. Unlike other pranayama techniques, this practice can be done anytime, anywhere, without the supervision of an instructor.

Practice this yoga gem the next time you have a few minutes to spare and want to quiet the mind and regain focus. It is a great exercise to have in your back pocket and I highly recommend adding it to your yogi toolkit :)

The how to:

Begin by taking a tall seat, with the legs crossed. Ideally the hips are higher than the knees. Feel free to sit on a blanket or yoga block if this makes this alignment possible and/or feels better for your back. Close the eyes and begin to breathe evenly in and out through the nose.

Once you feel you have established a consistent rhythm, breathe in for the count of 2 and breathe out for the count of 4. Take a few rounds of this breath ratio. As you are ready, increase the breath ratio by inhaling for the count of 3 and exhale for the count of 6, then progressing to a ratio of 4 to 8, and so on. Take care not to push past your breath capacity. This exercise should feel calming and should not create strain.

Take this 2-1 breath for a few minutes, or until you feel the mind settle. Once you feel ready, take a few even breaths, bringing the breath back into a steady, equal rhythm. Open your eyes and continue your day, with a bit more calm and clarity. 

Just a few minutes of Rechaka Pranayama has the ability to quiet the mind. Try it out the next time you need to recenter, such as the next time your train is stalled! Give it a try for instant calm.

Just a few minutes of Rechaka Pranayama has the ability to quiet the mind. Try it out the next time you need to recenter, such as the next time your train is stalled! Give it a try for instant calm.

Self Care Sunday: DIY Lavender Sugar Scrub

Self Care Sunday: DIY Lavender Sugar Scrub

Happy Mother's Day!

Whether you are looking for a last minute gift for Mom or a super quick and simple way to treat yourself on this Self Care Saturday, this DIY lavender sugar scrub is always a good idea.

All you need is sugar, coconut oil, lavender essential oil and, if you want to be fancy, some lavender petals.

This scrub can be used on your face, body and feet. The coconut oil will leave your skin smooth and glowing while the calming scent of lavender will stay with you all day. What's best, this recipe only takes 5 minutes to whip up!


Lavender Sugar Scrub

Ingredients:
1 cup Sugar (white or brown)
1/2 cup coconut oil
15-20 drops lavender essential oil
1 tsp lavender pedals (optional)

Stir all ingredients together in a large bowl. If the coconut oil is in solid form, heat it for a few minutes until it turns liquid. If you desire a less coarse scrub, add a few extra tablespoonfuls of coconut oil.

Transfer into a container and voila! You have the perfect gift for Mom. Save a bit for yourself and have a wonderful Sunday!

Self Care Sunday

Self Care Sunday

If you have been practicing yoga for a while, there is a good chance you have heard the yoga cue to “breathe into your heart.” The verbal assist is meant to energize the inner body of the chest, as well as open the physiological body by making more space in the sternum, widening the collar bones, creating a sense of lightness, promoting good posture, and a developing a feeling of freedom in the upper body. 

While this verbal cue might sound abstract, it is actually an anatomically sound instruction. When we breathe in, the diaphragm (the dome-shaped muscle primarily responsible for the act of respiration) contracts downward, creating more space for air entering the body. When we exhale, the diaphragm relaxes upwards, assisting our bodies in the release of air. This not only allows for our full, deep yoga breathing, but the pumping action of the diaphragm also massages the heart. Therefore, we can literally breathe into our hearts!

We could all use some self-care techniques in our back pocket. Practice this exercise anytime you need to connect with your breath and de-stress.

This pranayama can be practiced in any pose with a long spine and a free abdomen, such as an upright seated position, savasana, or supta baddha konasana. 

3-part breath (dirga swasam pranayama), The Step by Step:

Find your seated or supine pose and bring your attention to your breath. Allow the breath to be continuous as you initiate your inhale from the low belly, lift the breath into the rib cage/diaphragm, and then the chest. Once you reach the top of your inhale and your chest, take a long, continuous exhale, following the same path in reverse. If helpful, you can use your hands to guide your breath as you move up and down the torso, as shown in this video.

Inhale: one long breath into the low belly, rib cage, chest
Exhale: one long breath out through the chest, rib cage, low belly
Repeat 5-10 rounds. you may slowly start to lengthen the breath as you feel ready.

Benefits:

    •    teaches one to breath fully and deeply
    •    can calm and ground the mind
    •    can help to decrease stress and anxiety
    •    can help one to focus on the present moment

*Proceed with caution with this and all breathing exercises, especially if you have a respiratory condition. as with all pranayama, stop if you feel light headed.

Rest & Restore with Legs-up-the-Wall

Rest & Restore with Legs-up-the-Wall

Only have 5 minutes to squeeze in a yoga practice? No problem! Let me introduce you to one of my all time favorite yoga poses, Legs-up-the-Wall (Viparita Karani). This restorative gem can help restore energy, boost circulation, reduce stress as well as help with jet lag and insomnia. This pose is a restorative inversion, making it the perfect pose for tired, swollen legs and feet, at the end of a long day. All you need is a spare wall and a few minutes to transform your day.


The step by step:

Sit beside a wall, with your hip touching the wall and your knees bent up towards the ceiling. Gently lie down on your back and slowly swing your legs up the wall. 

A couple of sweet additions to this pose include a low folded blanket under your head, a blanket under your hips and/or an eye pillow over the eyes. Feel free to add one or more of these calming options to your practice.

Stay for 5-10 minutes. If your legs fall asleep, bend your knees in and then re-stretch them as you are ready. 

To exit the pose, roll to one side, pause here for a few breaths and then make your way up to sit.

Enjoy the rest of your day or evening, feeling rested and restored.  


*Consult your doctor before trying this pose if you have any concerns about practicing inverted poses